In May, at the 2016 Digital Media and Composition Institute at The Ohio State University, we (participants) were each tasked with creating a Concept in 60 video. This video needed to explore a concept of literacy, composing, or multimodality and be exactly 60 seconds—no more, no less—including the title screen and credits.
Because I have done the “Concept in 60” project in the past at my home institution (University of Louisville), I wanted to challenge myself with my DMAC 2016 approach by creating three specific rhetorical constraints for myself, which I go into further detail about in the earlier rendition of this piece. Here, I will focus on one of these goals: to closed caption my video.
I wanted to ensure that my project would be accessible to as many audiences as possible by incorporating closed captioning and putting access at the top of my brainstorming, designing, and composing process. As researchers and composers, we should strive to begin with access rather than treating it as an afterthought. Additionally, captioning is not merely an add-on for disabled people; it helps makes a video more accessible to all audiences.
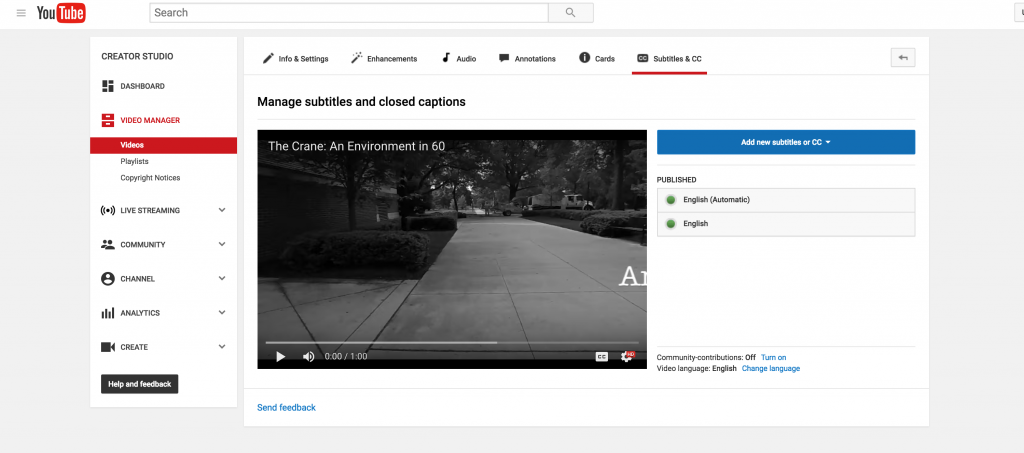
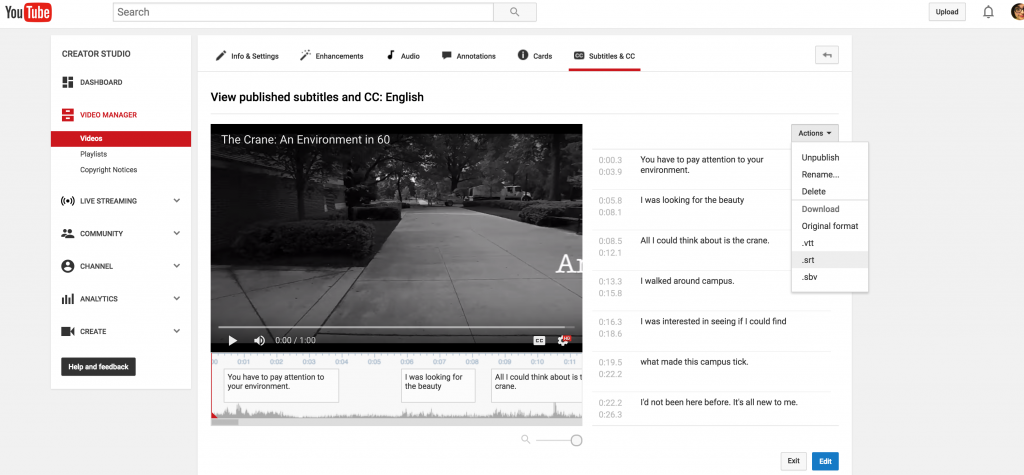
While it might seem as simple as uploading my MP4 file to YouTube, using YouTube’s closed captioning tool, and downloading the MP4 file off of YouTube, unfortunately the captioning track does not get “burned onto” the video file and therefore does not download with the MP4 off YouTube. In other words, these are OPEN captions, not CLOSED captions. However, you CAN download just the .srt captioning track file (as visualized below) and use other software to attach it back to the MP4 file.
After a few hours of tinkering during our final studio time Thursday, and with the excellent help and brain power of our fearless associate director of DMAC, Erin Kathleen Bahl, I found a way to attain success in my closed captioning goal. Here, I will recap the winning steps. These can be repurposed for multimodal research projects, but I also want to offer this process as a pedagogical tutorial to share with digital composition students.
First, I want to note that the detailing of “failure” moments are omitted for the sake of clarity here, not because they weren’t productive in some form. To sum up with a brief example: we were not successful using VLC or solely YouTube to create the closed captioned version of my Concept in 60, but through lots of googling, playing, failing, more googling, and more playing and failing, we learned some strategies for achieving the captioning goal as well as some new-to-us software. Ultimately, it’s important to take risks and play; failure is is part of the learning and multimodal composing process.
To begin, I uploaded my video to YouTube and created a closed captioning track. The captioning tool is located under the EDIT drop down menu that you want to close caption in the video manager section of your YouTube account as pictured below.

From here, you can add subtitles and time them with your video. (For a detailed step-by-step of this process, see this YouTube help page.
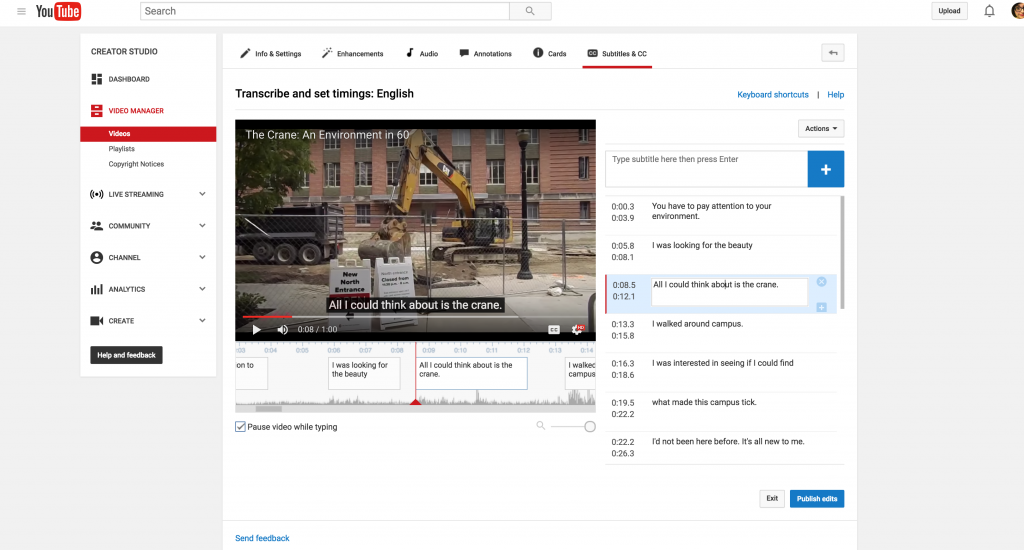
After publishing these captions, export the .srt caption track file from YouTube’s caption tool. While exporting the mp4 file would ideally do the trick, I learned (from failing a few times and reading some sites on the issue) the caption track is not burned into the mp4 and therefore does not carry with it outside of YouTube.
From here, the next step involves a different software called HandBrake, an open-source video transcoder. Begin by clicking “File,” and selecting the “Open Source” option. Then, navigate to the uncaptioned video file.
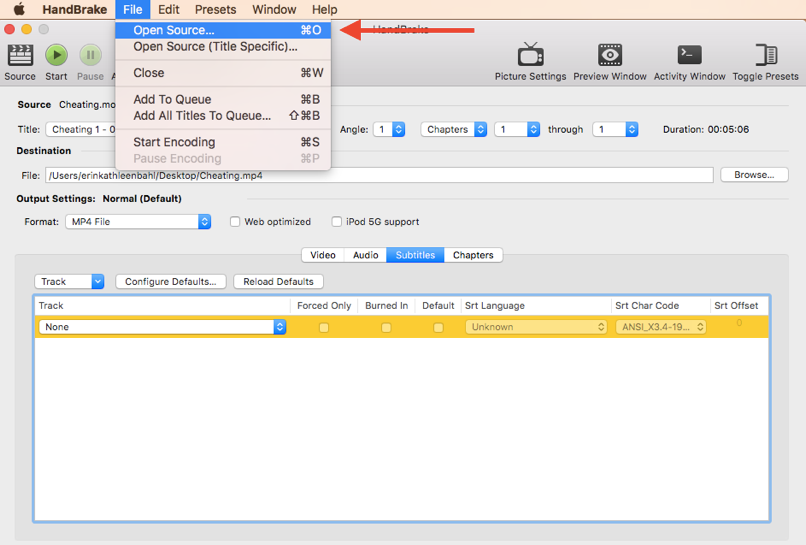
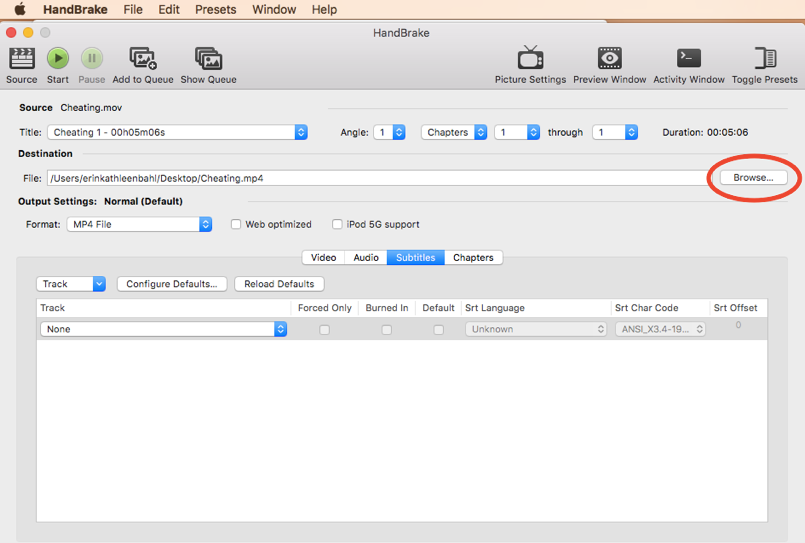
In the “Destination” section, click “Browse” and select where to save the final video.
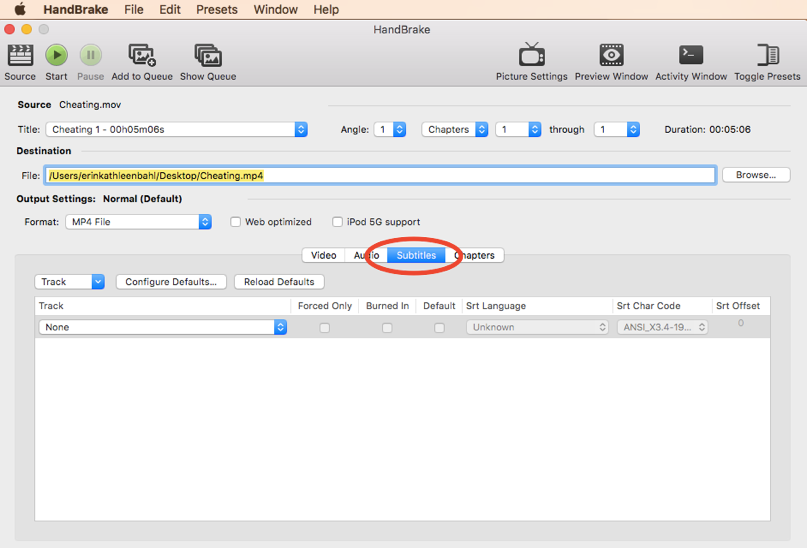
Select the “Subtitles” tab.
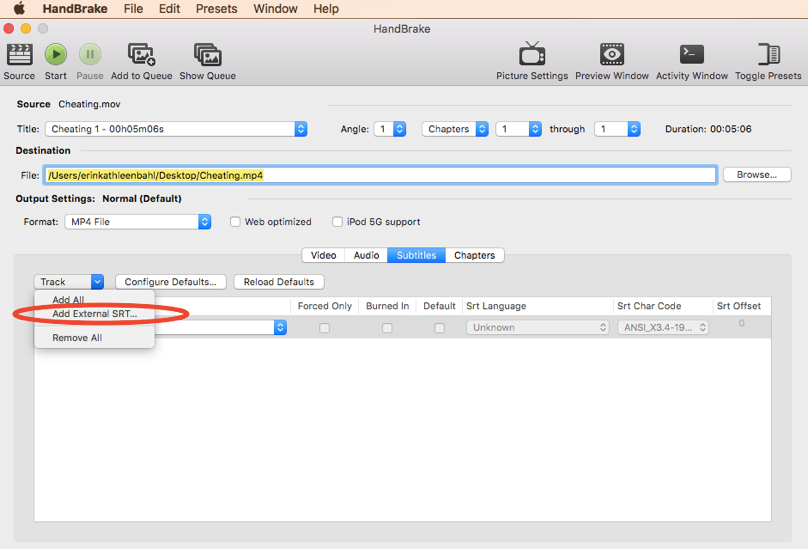
Under “Track,” select “Add External SRT” and navigate to the saved subtitle file.
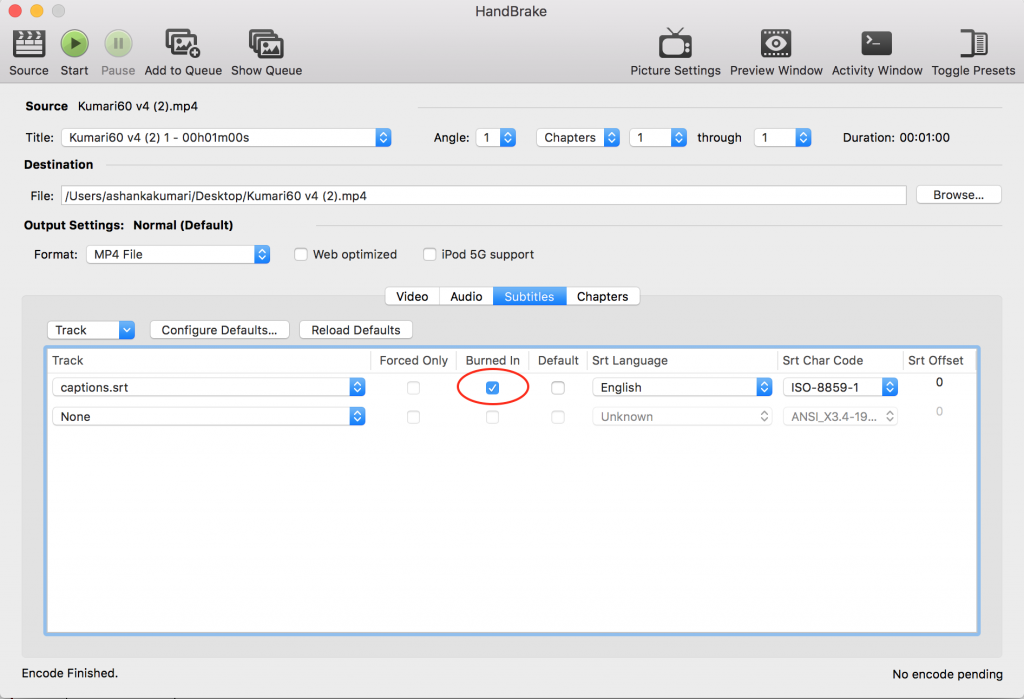
Select the “Burned In” option to insure that captions get “burned” into the MP4 file.
Finally, under “File,” select “Start Encoding.”
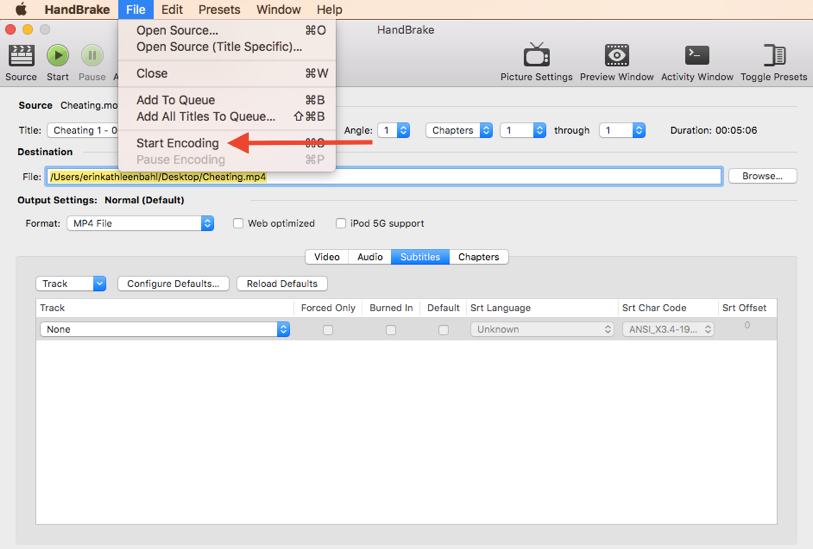
And that’s it. The video file should now be closed captioned.
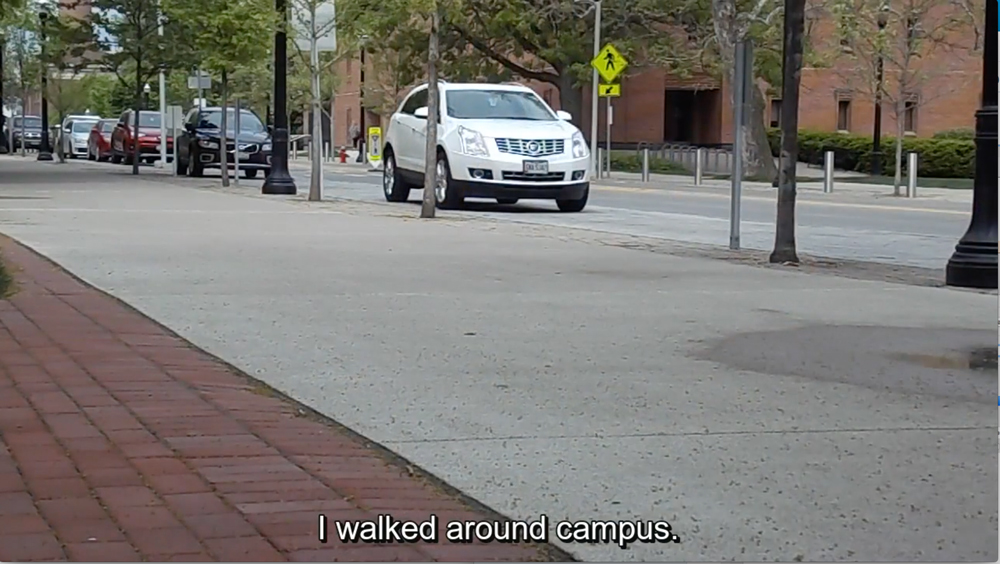
This process illuminated the lack of closed captioning tools in production software. As exemplified here, I needed to use three different applications (iMovie, YouTube, and HandBrake) in order to create a close-captioned video file I could have locally rather than in a web video space like YouTube. As we continue to design software for editing video, closed-captioning tools should be an intuitive part of editing software. Because while it’s never too late to think about captioning and accessibility, as composers and researchers, we should strive toward beginning with access as an integral part of the overall design process.
